Repair: Patent Etui
The Patent Etui was a series of folding plate cameras manufactured by Kamera Werkstätten and sold between 1920 and 1938. The name Etui, the word for a woman's cigarette case was meant to highlight the light and slim design. They were available in two sizes: 6x9 and 6x12, and while designed for glass plates, are compatible with a number of 6x9 roll film holders.
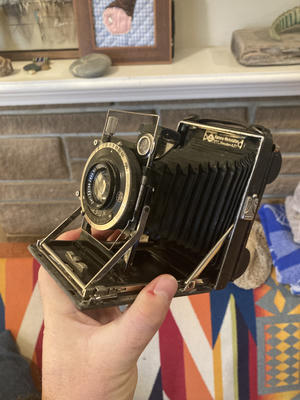
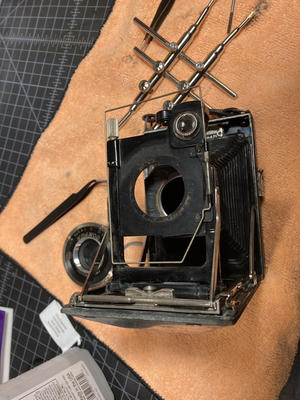
I found this camera at a very strange estate sale in a pile of vintage folders. The Zeiss lens, Compur shutter (mostly working), and (mostly) intact bellows stood out to me so I grabbed it.
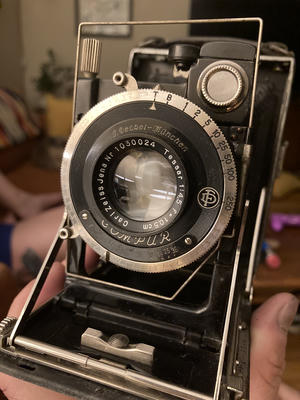
The lens serial number (1030024) and rim set Compur shutter date the camera to around 1930. It's in pretty good shape for a camera nearing it's 100th birthday. The biggest glaring flaw was that the front leatherette was completely missing. Beyond that, the Rollex-Patent film holder it came with was pretty rusty and not moving smoothly, there were a few small pinholes in the bellows near the top right, the slow shutter speeds on the shutter were slow, the lens was dirty, and the whole camera needed a good cleaning.
Fixing: The Front Leatherette

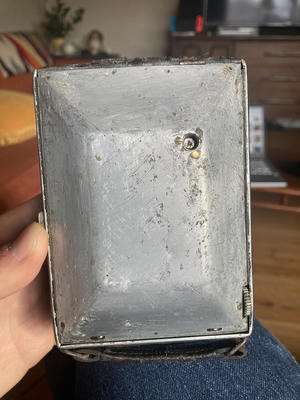
Other than the missing front leatherette the rest of the camera is wrapped in a nice burgundy leather. I don't think I'll plan to source a replacement that matches. For now I've sanded down the old glue and cleaned up the aluminum case. Maybe in the future I'll glue a new piece of leather down.
Fixing: The Rollex-Patent Film Holder

The holder had a bunch of rust. Mostly I came through with some 1000 grit wet/dry sand paper and removed all the rust and peeling paint. There is a missing brass stud to hold the film spool but it seems to operate okay with out it.
Fixing: The Bellows
I mixed about a 50/50 mixture of Elmer's Glue and matte black acrylic paint and applied coats of it onto the holes until they no longer showed light through them in the dark.
Fixing: The Shutter
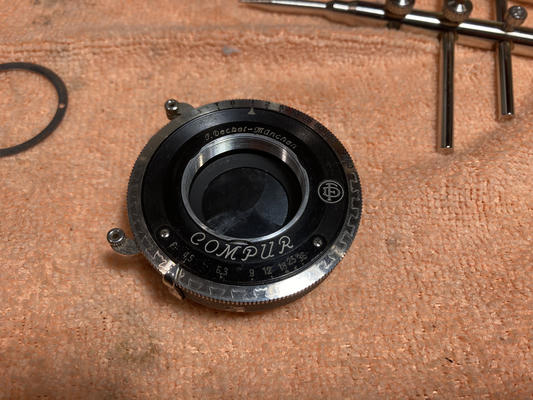
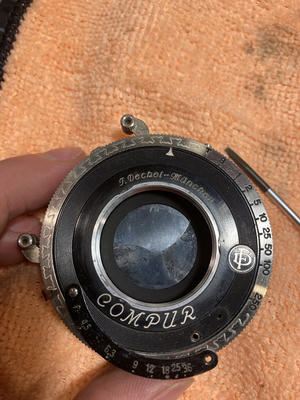
The shutter on this camera is a pretty standard rim set Compur shutter with shutter speeds B, T, 1 to 1/250. It has a nice 10 element aperture that was moving stiffly and while the top shutter speeds seemed to be working okay, the slow shutter speeds, in particular the 1s were substantially out of spec. Slow shutter speeds are almost always the result of aging grease and oils, some of which have hardened, some probably migrated onto the shutter and aperture blades. To fix the issue the standard protocol is to fully disassembly and clean EVERYTHING.
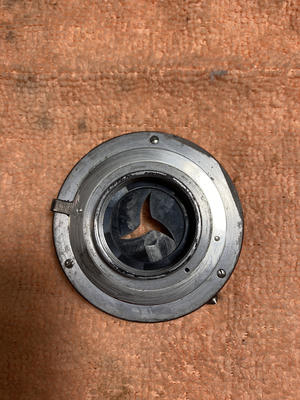
Removing the shutter on this camera is blessedly easy. With the camera folded you can directly access the rear cell and the shutter lock ring. Removing the rear lens cell before the shutter helps the shutter clear the hole when removing it (and protects the cell from damage). Then unscrew the shutter lock ring, being careful of the fragile bellows.
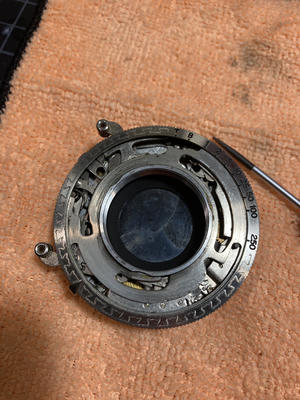
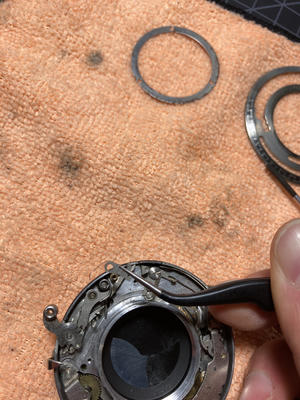
Once removed the shutter can be opened by removing one screw from the aperture marking plate and sliding it out of the way. A locking post is hidden beneath it; when unscrewed the whole top plate can be rotated clockwise and lifted off the shutter.
Below the top plate is the control ring. Take some notice of the position of the plate and the shutter speed post.
The control ring lifts out easily once it clears the aperture control lever. Below the control lever is the rest of the shutter and where this starts to get a bit trickier. At this point it is worth slowing down and taking note of how ever piece sits in the shutter, how the springs lay, and what the position and the adjoining parts were. I take more pictures than you could imagine, and every part that comes off, goes into a tray with the screw that held it down.
Below the control ring sits the main spring. The main spring and ring drive the shutters operation. Detach the spring at the post on the shutter and lift the main spring out of the shutter.
A note on how slow shutter speeds work
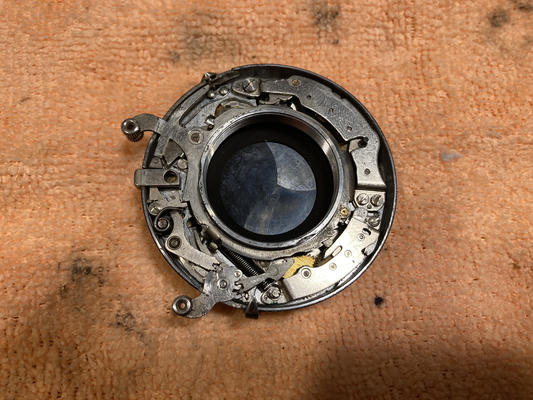
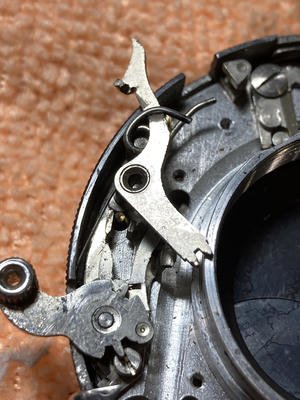
It's worth understanding how the slow shutter speeds work before trying to fix them. The key players are the main spring and the retard gear train. The main spring touches two important control points on the retard gear train.
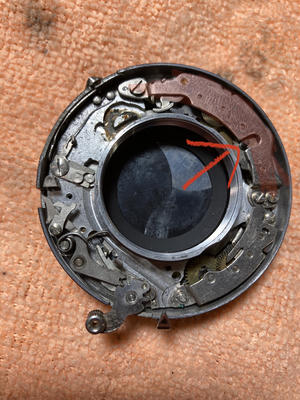
There is a peg (pointed to by arrow above) on the retard gear train (marked in red above) near the bottom. When the shutter is charged (and the main spring is advanced clockwise fully), in order for the main spring to return it has to lift the peg sufficiently. The peg is connected to a spring and a bunch of gears that very precisely controls the speed that the peg can be lifted. The shutter speed control ring adjusts this peg up or down slightly adjusting the amount of lift that the main spring must apply, and thus the time it takes to return.
In order to clean the aperture blades and shutter blades the back of the shutter needs to be removed, which in turn involves removing the plate that all the parts are attached to. This can be done without removing all the parts, but all the parts with springs touching the case should be removed to avoid damaging the springs. Note that you do not need to remove the retard gear trains. Their position defines the shutter speed adjustments and moving them will require readjustment.

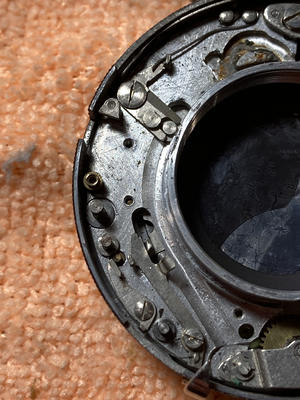

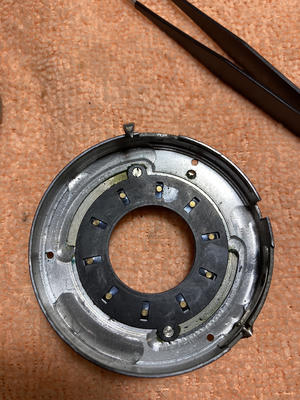
When everything is removed the case can be flipped over and the three screws holding the plate to the case can be removed. Below the plate you'll find the shutter blades attached to the bottom of the plate, while the aperture blades are attached to the case.
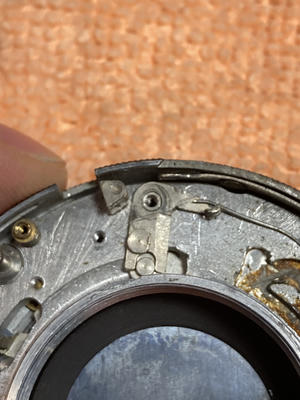
To clean the aperture blades remove the small plate with slits in it holding them to the case and lift out the blades. Make note of how it sits in the case, you'll need to replace it upside down, and knowing exactly how to put it back will help. They will likely all come out together, stuck with old oil. With care each blade can be cleaned and set aside. Take this time to clean whole bottom part of the case, the inside, as well as the outside around the aperture lever.
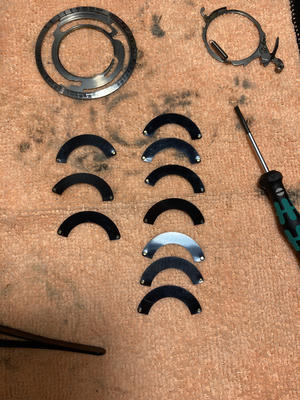
When all the blades and case are clean it's time to reassemble the aperture. This is in my opinion the most challenging part of the process. I found it easiest to take the small plate with slits and place it upside down on an old film canister. Then placing the blades onto their position on the plate one at a time working clockwise. The final three or so will have to be slipped under the first few. I do this by pushing the earlier blades out of the way to make room and then as gently as possible sliding the newer blade under it. When you have each of the blades back in position the case can be placed back on top.

With the aperture blades replaced, the shutter blades can be cleaned. The shutter blades are attached to the plate with a screw each (they each have a little peg that fits into a rotating plate in the center of the main plate that actuates the shutter). Like the aperture blades they should each be removed and cleaned. This is also when the plate should be cleaned thoroughly.
When the plate and blades are clean it's time to reassemble the shutter. Reversing the process above one piece at a time. Note: It can be a little tricky to get the main spring back in place correctly. Take care to make sure that the ring is correctly positioned inside of the peg on the retard gear train, the lever that releases the peg, and a little lever on the other side that works with the B and T settings. With care (check your photos!) and patience at the end of this process you should have a clean and working shutter.