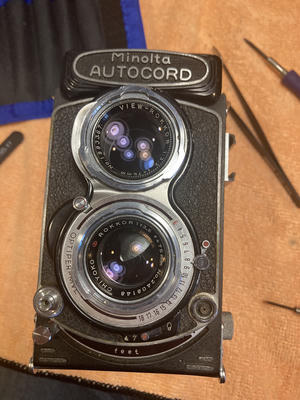
Repair: Minolta Autocord
The Minolta Autocord was a Twin Lens Reflex (TLR) camera manufactured between 1955 and 1966. It was a popular camera designed to compete with the Rolleiflex from Germany but at a much more affordable price point. Like the Rolleiflex it was equipped with a four element tessar type 75mm f3.5 lens. Today they remain an affordable alternative to more expensive TLRs on the market; A reliable, light, and easy to carry medium format camera, with a tack sharp lens. Of all my cameras, the Autocord might be my favorite camera when I just want to walk around and enjoy taking pictures.
I love digging into new cameras and learning how they work, but there's an old rule of repair, you don't practice on something you love! So I've been patiently watching for a good deal on an autocord to come up. Imagine my excitement when a woman in the local camera club mentioned that she'd be willing to part with a broken one for cheap. Which brings us to today's post. Repairing a Minolta Autocord.
This Autocord arrived with a number of a couple of obvious issues. Focus was a disaster, it sounded like the focus mirror was loose and bouncing around up top, and viewing through the focus screen was all wrong. The shutter speed controls worked, but were incredibly stiff, to the point where I worried about breaking the lever.
Fixing Focus

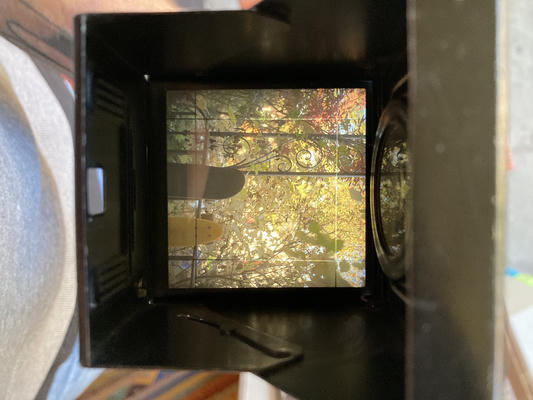
Getting to the mirror on the autocord is a simple affair. The four slotted screws must be removed. After that the focus hood can be simply lifted off the body. Looking into the body, the problem made itself apparent.
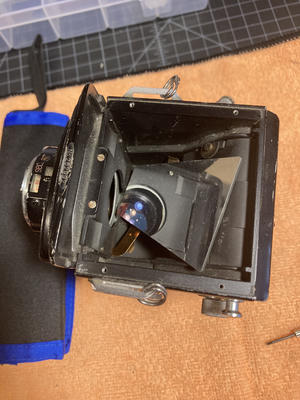
Replacing the mirror is easy, but a little fiddly. The mirror rests on top of the brass springing armature, under the two half moons on either side of the body, set into the holder at the bottom. The fiddly part is just getting it all set and the moons tightened without them falling out. But nothing patience can't solve.
Fixing the shutter speed control
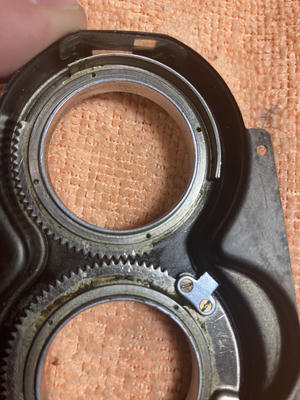
The shutter speed controls on the autocord fit into a complex assembly attached to the front of the camera surrounding the lenses.
The control assembly can be removed by lifting the leatherette on the front and removing the 4 screws holding it to the body as well as removing the head of the flash sync lever. [Warning: There are two little screws at the bottom of the front plate that look like maybe they could be involved. They are NOT. They hold a lever arm that actuates the shutter lever from the shutter release button on the body. If you remove them you will have to remove shutter to get access to them].

There were three issues causing the shutter speed controls to be extra stiff. First you might be able to make it out but there is a vanity ring that surrounds the controls and filter bayonettes on the control assembly. This one had been bent horribly at some point and a large hill in the middle caused the Light Value ring on the shutter speed controls to rub. Second, the control assembly was full of old sticky grease. Third the actual shutter control on the shutter is a bit stiff. I figured I would disassembly the assembly to remove the vanity plate. Straighten it out and reinstall it, and in the process give everything a good clean and grease and that would kill two of my birds with one stone.
Disassembly turns out to be not too bad. Both control rings sit around the taking lens, and communicate the changes to the window above the viewing lens through a geared ring. Both sets of rings are fixed to the assembly with a locking ring and then a spacer. All can be removed with a lens spanner [Warning: Mine werequite tight and required a good bit of muscle to get them to turn]. In order to keep track of where each ring started and where they lined up with their meshing gear I recommend making a mark on each gear that shows alignment.
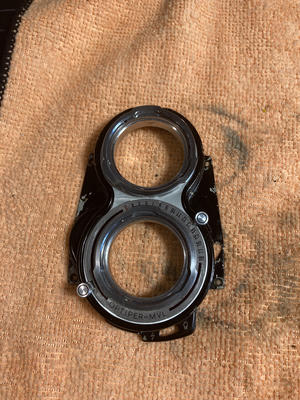
With the vanity plate straightened and the gearing all cleaned and greased the shutter speed control remains a little bit stuff, but completely usable.
Once focus and the shutter speed controls were working I ran a test roll through the camera. While the shutter worked well it did expose another issue, something was wrong with the film winding mechanism.
Fixing the winding mechanism
Normally with an autocord the crank on the right both winds the film and charges the shutter. You do a 3/4 wind the crank stops, you wind it back to the top, you take a shot, repeat. But on this camera, I would take a shot and then not be able to advance the crank arm more than 10 or 15 degrees. There is an interlock in the crank assembly that prevents winding without having taken a shot, and this interlock was missbehaving. (There were other oddities, like winding too long, but this was the big one). To fix this issue we have to remove the right hand plate under the crank arm.
To start remove the crack arm, and strap lugs, and double exposure lever. Then remove the leatherette to reveal five screws. Remove the screws and lift the plate. [Warning: There is a little "mushroom" and spring that fit into the winding gear at the bottom, they will usually stick to the plate when you remove it and are easy to lose if you're not careful].
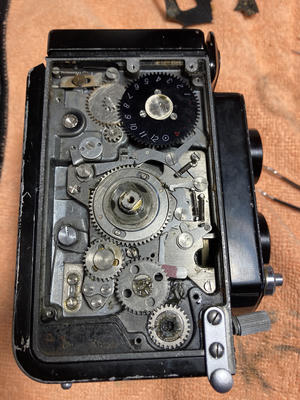
The shutter crank interlock lives on the right hand side of this mechanism. The way this works is somewhat complicated but I'll do my best to explain, with the help of the below diagram.

First to describe how the camera advances frames. When you turn the crank, and film is in the camera, there is a gear in the film spool that rotates the film counter. Under the film counter there is a toothed plate that the large y shaped lever slips into every frame. When that Y lever slips into the hole, its rotation moves the green lever clockwise, which unlatches the red lever. The red lever acts as a brake on the crank arm, halting further winding.
This process is reversed in two steps. First when the crank arm is reversed to put it back into the starting position, it shifts the y lever out of the gap and frees the green lever to return. Then when you fire the shutter there is a ring under the shutter that is released, connected to the blue lever, allowing the blue lever to rotate counter clockwise, sticking the back of the red lever. This lifts the red lever and it's caught by the hook on the end of the green lever.
In my camera, the blue lever wasn't moving with enough force to lift the red lever and so the brake wasn't being released consistently. Ultimately this ended up being due to two things. First that there were improperly installed washers on some of the pivots, and there was gunky grease on the rings under the shutter.
Cleaning the charging and reset lever rings
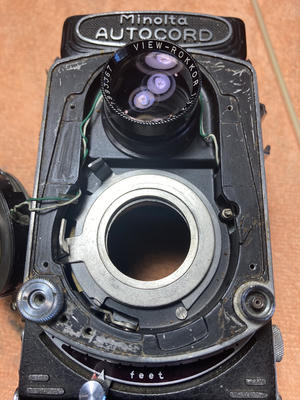
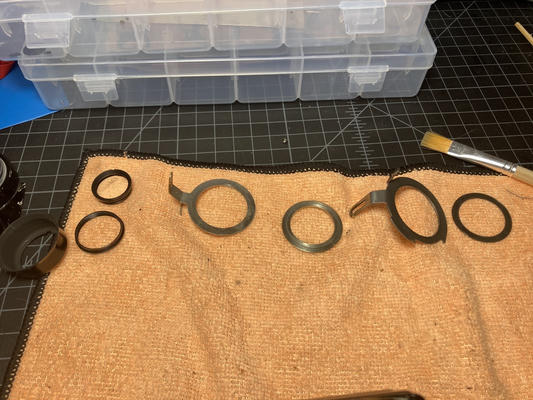
First in order to clean under the shutter we have to remove the shutter. This can be done by opening the back of the camera and removing a press fit light baffle, the rear element of the lens, and the shutter locking nut with a lens spanner.
Under the shutter of the autcoord are two important rings that communicate movements to and from the right hand plate. The shutter charging ring is rotated by a cam below the crank and actuates the shutter charging lever on the shutter. The reset lever ring (as described above) is tensioned and held until the shutter is released and begins the reset process on the right hand mechanisms. Both are held in place by the shutter itself. The order is focus spacing rings, reset lever ring, spacer, charging ring.
Although my camera had a lot of grease on these levers, I was informed by Karl Bryan (noted autocord repair person) that the chromed surfaces shouldn't have any grease on them. Removing the grease and cleaning everything reduced friction enough that the reset process worked.
Closing notes
Actually a surprisingly straightforward camera to work on. Everything was easy to get to and relatively simple. Another feather in the cap of the autocord I suppose, since I imagine this bodes well for its future repairability and longevity.
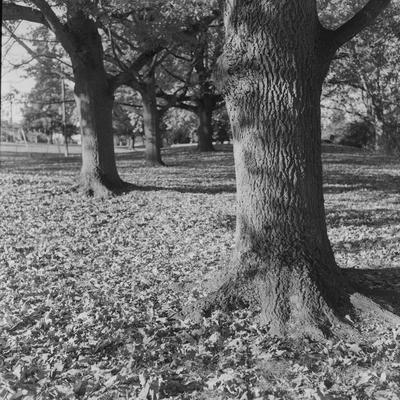
Here are two of the images from the test roll (HP5+ in D76 1:1 for 13 min). These are sharp, in focus, well exposed images and it looks like the camera is working well again.